Monday, August 31, 2015

Clown Vomit

I made a quick decision for a polish change the other night. I wanted a bright shade that still said summer, but I think I am ready to start phasing out the neons.

China Glaze UV Meant To Be is a bright yet dusty medium blue. It is a little bit hard to describe so I'll let the photos speak for themselves. Unfortunately, I forgot to take photos of this on it's own... I have been a busy beaver lately...

Good news is I layered a brand, spanking new glitter from Orly over top, Turn It Up.

The formula on UV Meant To Be was okay, not too think, not too thin. Two coats offer full coverage, I like how the formula was more of a creme than a neon. I do with there were such thing as a blue neon though, I think this is the closest I have ever owned.


It looks super cool under black light, unfortunately it does not photograph as glowy as it actually is. It is also unassuming. I find indoors and normal light settings it looks like a medium blue. But in natural sunlight it  really glows! Especially when overcast!


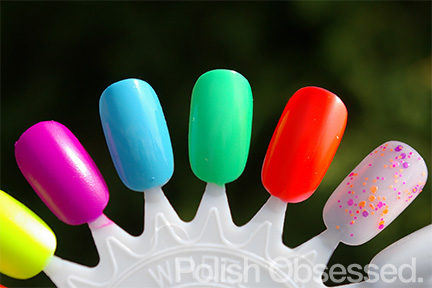
I was hoping that Turn It Up would be a decent coverage glitter gauging from how it looked in the bottle. Honestly, this is super saturated, way more glitter than I would have thought! What you see on my nails it only 1 coat (and blobbing). Crazy amounts of glitter in this polish and I love that they are bright, vibrant and matte. I am glad that I layered this glitter over UV Meant To Be, it blends with the glitters well. To be honest is started out as an accent nail thing, but quickly turned in to mani refresh.

I have been a sucker for interesting glitters lately, but almost left this one behind, I'm so glad I didn't!

Friday, August 28, 2015

Are You Jelly? Version 2

Happy Friday! Today I have the second bottle of China Glaze Are You Jelly? I purchased recently. When compared to the original release, it is more red based, where the other is more blue based and closer to a true purple.


That being said, I purchased this again because I was in the hunt for a red based purple/magenta neon. This polish delivered exactly what I was looking for!

The formula was great. I usually apply oldish at night before going to bed to avoid and dings or dents and this held up pretty well the fist day! I only needed two coats for full opacity. It dried to the typical satin finish neons are known for. A top coat really made this polish shine, it is super glossy!


The only downside to this polish is that it started chipping sooner than I anticipated. I'm not sure whether to blame the polish or my nails. I find when my nails are thin or weak nail polish does not adhere very well. It's sad today that I can feel the colder win coming in and summer ending, it is having an effect on my nails. I still got a good five days of wear in my fingers. I also applied Are You Jelly? to my toes and no chips yet!

Monday, August 24, 2015

Blinding!

Today I have a lovely neon to share with you, China Glaze Celtic Sun. An oldie, but a goodie for sure! Why I didn't have a neon yellow in my collection up until a month ago I'll never know.


I'm pretty sure that China Glaze has reformulated their core neons, however I find this one to look the same as the original (if it was even altered?). I'm referring to online sources of course. After swatching my neons haul on my boyfriends nails (hey, he offered, I'm not going to turn that down!) I decided to wear this polish I would need a base of white, like I have read so many times.

Celtic Sun is on the ring finger here at two coats.

I started with one coat of Sally Hansen Insta-Dri in Whirwind White and applied three thin coats of Celtic Sun over top. The formula is quite thin, but applied well. I'm glad I had a base of white. Not only did it help with opacity but really made this neon GLOW!


As most neons do, this dried to a semi-matte/satin finish. I added a nice coat of Seche Vite over top to add a high gloss shine. I loved wearing this. Everyone thought this polish glowed in the dark, it is that bright!

Thursday, August 20, 2015

Reader Feedback Needed: Polish for Sale!

I have a quick post today. I have been meaning to go through my collection and weed out polishes I don't wear (or brand new ones I changed my mind on) and get rid of them. I don't have any specifics on brands since I have not gone through everything yet, however, I was wondering if you wold be interested if I were to create and share an eBay collection of polishes for sale. I know off the top of my head that I do have some rare and hard to find polishes (OPI DS, Sally Hansen Prisms, etc).

Would you be interested? What would you prefer:
  • single polishes or lots?
  • buy it now or auctions?
I am pretty new to selling on eBay but would love to share some of my stash with you. Please let me know your thoughts in the comments.

Wednesday, August 19, 2015

July Favorites

This is an ongoing monthly post which highlights some of my very favorites from the month past. 

Today I have my most favorite things from July. Check them out below.

Favorite Polish - Neons
For the most part, July gave us some amazing summer weather and with hot temperatures comes hot polish! I have been loving neons in excess last month, weather it was wearing what I already own or buying new ones. I don't know if I have one favorite out of what I had worn/purchased in the month of July, but Orly, Thrill Seeker did surprise me with how bright it was!


Favorite Clothing - Shorts
It was so hot for a few weeks that it was hard to wear much. Most days I just hung out by my pool in a bikini! Since it is hard for me to decide on a favorite bikini (like neon polishes, I have MANY) I can decide on one favorite article of clothing last month, these soft patterned, high waisted, flowy shorts from Garage.  I must have work them at least 75% of the month! They are so comfy and versatile to dress up, down and anywhere in between!


Favorite Nail Art -Colour Blocking
Hand down the easiest and quickest nail art I have ever done. So quick and easy to refresh your mani with colour blocking. The funny thing is I thought it would end up a hot mess, but I really loved this mani. To view the original post for this look, click here.


Favorite Book - Inside the O'Brian's by Lisa Genova
This book had me hooked, I could not put it down! Knowing people close to me have had to (and still are) living with HD made this book an emotional read for me, but the research that went in to the writing and the story telling really made this a great story. I love how it focuses on Huntington's Disease and makes it a topic for discussion. Not a lot of people know what this disease is and I think it is an important one to know about and fund for research.


Until next month!

Monday, August 17, 2015

Sprinkle Jelly Doughnut

...At least that's what my boyfriend called them! I kind of agree, I mean if they were super radioactive sprinkles or something.

I wanted to use my neon glitter toppers from China Glaze's Electric Nights collection before summer was over. I am hoping the bright glitter pigments do not bleed in to the base like the previous one I purchased, Point Me To The Party. To recreate the look of this polish, I layered Can I Get An Untz, Untz, with Let The Beat Drop. For the creamy "icing" base polish I used Essie Marshmallow.


So here is what happened, I applied two coats of Marshmallow to my nails, let them dry for a few minutes and blobbed on some glitter from each polish. The result looks great from afar.... however when a closer look is taken you can see a pink haze from Let The Beat Drop (Doh!) and BUBBLES, BUBBLES, everywhere!


The next day it drove me to the point of removal and reapplication! I know, crazy right? Not like me at all, but bubbles seriously annoy me! Can you see a difference below?


So, what did I do differently?


I applied slightly thinner layers of Marshmallow and allowed some extra dry time between coats. When applying the glitter to the nail I used a cosmetic sponge wedge to soak up excess base and get good coverage of glitter on the nail without adding extra polish. The result was much better!


The one thing that always bothers me about using cosmetic sponges in nail art is that for some reason it likes to attract dust. Does this happen to you too? Other than that I am pretty happy with the outcome of this look (finally). A little disappointed that Let The Beat Drop has started to bleed a bit in to the base, but I am happy I was able to remedy that with sponging on the glitter instead.


I really love these glitters and would suggest getting these two over Point Me To The Party. Not only do you get the same look of this polish when they are layered, but you can use them on their own as well! I think I want to try this over black next, I can see it making the neon glitter really pop.

Friday, August 14, 2015

Victoria - Bio Seaweed Gel Review Part 2

Happy Friday! Today I have part three in my Bio Seaweed gel polish series. I decided to try out Unity All-In-One Soak-Off Gel Polish 261, Victoria on my toes.

Victoria is such a great summer shade, it's a light, yet bright, pastel creme that boarders the line of neon. I usually prefer more feminine shades or bold cremes on my toes, but really am liking this colour. 

The formula is on the thick side, but nothing too unmanageable. My need to thin my polishes out was strong with this one, however! I applied three thin coats to the nail curing for a minute with my UV LED lamp. 

What I love about this formulation is that you do not require a base or topcoat and there is no sticky layer to remove after curing. I have been wearing this shade for two weeks now and it looks the same as it did hen I applied it! To let you know how hard I work my feet, I do a lot of walking in one day for my commute in to work plus I get my workout in six days a week... I can be pretty hard on my feet. But this gel polish has stood up great so far!


The final post in this series will be a recap and follow up of the products I used from Bio Seaweed Gel, The No-Wipe Top Coat I used for my broken nail and Victoria for my pedicure. This will include how long they lasted, and what they looked like before I removed them.

*This product was sent to me for an honest review, all views expressed are my own honest option. 

Thursday, August 13, 2015

My Way Or The Highway!

Today I have a shade from the China Glaze Road Trip collection released this past Spring that reminds me of the early 2000's...


I had to lol, I'm totally listening to this while I'm composing this post! This is China Glaze My Way or The Highway, A beautiful blue leaning teal crelly.


The formula was awesome and applied really well to the nail. The first coat was a little bit thin, but the second coat built up to full coverage easily. It was a welcome pallet cleanser to my bright neons and complements my tan well.


To be honest, I picked up this polish 50% based off the name alone with the intent of wearing it for good luck on my road test. Last year I wore Petal To The Metal and had a great test, this is the last test before I get my full license and it's on the highway... I just had to buy it and wear it for my test!

Monday, August 10, 2015

CosmoProf Haul

Today I have another bright neon haul to share with you! I was pleasantly surprised to find the Electric Nights collection at my local CosmoProf. I have been finding it harder and harder to track down the latest collections at Sally's recently and CosmoProf usually has what I'm looking for. I picked up four polishes from the Electric Nights collection, and one re-promote from 2013's Summer Neons collection.  I have to admit that at first glance this collection didn't appeal to me, but after all the hype online and finally seeing them in person I got why they were so popular.


First up is Are You Jelly?, UV Meant To Be and Treble Maker.


Are You Jelly? is a a neon magenta based purple neon. I originally picked up this shade in 2013, but this re-promote is not the same as the original. The original is more of a true purple crelly. It dried to a matte/satin finish. If you compare the photos in this post to the previous one (original formula) it is not very apparent they are different. In person it is easier to see the difference. Let me know if you are interested in a comparison post.

UV Meant To Be is a light blue with a hint of dustiness. Hard to describe, but really pretty. The only one I purchased from this collection with a glossy finish.

Treble Maker is probably the hardest to describe and one of my favorites! It is a medium green that verges on being a neon, but is not as in your face. this dries to a satin finish.

Next up is Red-y To Rave and Let the Beat Drop.


Red-y To Rave is a bright red/orange coral neon with coverage rivaling a creme. It is super bright and unique. It dried to a satin finish.

Let the Beat Drop is a neon glitter suspended in a clear base. I returned Point Me To The Party due to lack of assistance from China Glaze (they did not respond to me when I contacted them regarding the bleeding of glitters in the polish). I am hoping that the glitters in this one don;t bleed overtime as well, is consists of orange pink and purple neon glitters of various sizes.

Below are swatches of my haul:


And another one of me recreating Point Me To The Party by layering Let The Beat Drop over Can I Get An Untz, Untz. That was a mouthful!


I will be layering this combo over white very soon!

Friday, August 7, 2015

Healing A Broken Nail - Tutorial

Today I have part three of a four part series reviewing the products I was sent for review from Bio Seaweed Gel. Since the gel polishes they supplied me with do not require a top coat on the toes, I decided to try their No-Wipe Top Coat for another purpose, a broken nail.

It was a split second mistake that almost ripped off the free edge of my middle nail! I patiently waited all day to mend the hanging nail. It happened on the way in to the office. As soon as I got home I went to work on the nail!

What I used:
  • polish remover
  • super glue (or nail glue)
  • strip cut from tea bag
  • Bio Seaweed Gel No-Wipe Top Coat.
I carefully removed the polish from the nail. Once the nail was bare, I lifted the broken nail upwards and applied a small drop of glue. I then pressed the two pieces of the nail back together and held in place (make sure there is no glue on your fingers).

Once that dried, I added another few drops of glue to the nail and applied the tea bag strip. I made sure to fully cover beyond the break, but not the full nail. Make sure the strip fully adheres to the nail and absorbs the glue.


Once that had dried, I filled away and buffed out the excess strip (shown above) and made the nail as smooth as I could. This is when I applied my UV gel top coat and cured. I used two coats for added protection (shown below).


The thing I like best about this gel top coat is that it does not produce a sticky layer which needs to be removed for the polish to shine. Less work and time spent on gels is always awesome!

This has been wearing great for me and really fused the broken nail back together. In the past I have just glued a fake nail on the broken one and waited for the nail to grow back in, but this looks and feels way more natural and I get to keep my nail and length without chopping down the rest!

Do you have any tips for nail breaks? What do you usually do?

*This product was sent to me for an honest review, all views expressed are my own honest option. 

Wednesday, August 5, 2015

Bio Seaweed Gel, Uptown Lights - Collection and Review Part 1

Bio Seaweed Gel sent me some polishes from their latest Uptown Lights collection for review. I was lucky enough to pick two shades from the collection of fifteen polishes.

Below are the colours, from left to right, top to bottom;
Row one: Charlottetown, Edmonton, Fredericton, Halifax, Iqaluit
Row two: Montreal, Ottawa, Quebec City, Regina, St. John's
Row three: Toronto, Victoria, Whitehorse, Winnipeg and Yellowknife.


I love how they incorporate their Canadian roots in to the brand. If you couldn't already tell, all polishes are named after various cities in Canada! The two polishes I chose were Victoria and St. John's. I kind of regret not getting Toronto (the light blue seen on the model's hand above), but I had a feeling that I had something similar.

This is an interesting collection for summer, some brights, neutrals and dusty taupes. I received the following, one No-Wipe Top Coat, Unity All-In-One Soak-Off Gel Polish, 261 Victoria and Unity All-In-One Soak-Off Gel Polish, 259 St. John's.


Victoria is a pastel, on the verge of being neon, lime green. This is my favorite out of the two!
St. John's is a deep and dusty cornflower blue.


What I noticed about these gels,when compared to the other Bio Seaweed Gels in my collection, is that they do not produce a sticky layer after curing, this was a welcome surprise! They both dry super glossy after one minute of LED UV curing.


I found the formula on each polish to be thick, however, St. John's was thicker than Victoria. Stay tuned for more information on application, usage and wear of the products I received in upcoming posts!


*This product was sent to me for an honest review, all views expressed are my own honest option. 

Tuesday, August 4, 2015

Birthday Polish Purchase!

I headed to Sally's super late this month to take advantage of my birthday coupon and picked up some bright shades of polish!

First up are Orly Thrill Seeker and China Glaze Pool Party.

Thrill Seeker is a bright lemon lime green creme that boarders being a neon, but lacks the highlighter pigment. Two coats are shown in the swatches below.

Before I continue, it must be said that the China Glazes I purchased are not the same as the originals (original release). I was hoping this was just a Sally's thing, but unfortunately I have gone to at least three beauty supply stores selling the same (newer) versions. I personally prefer the new Pool Party, it's a more coral based pink. If I recall correctly the original was more of a deeper pink/magenta shade.

Next up are China Glaze Celtic Sun and Purple Panic.


Celtic Sun is the classic yellow neon. For some reason I don't own one, now I do!

I'm not even sure what Purple Panic is supposed to look like, but I don't like it. I was hoping for a magenta based pink neon (similar to what you see swatched on the far right, which is not Purple Panic, more on that in another post), what I got was a muddy purple... Not impressed. It looks way better above in the photos than it does in real life. I think the original had a blue flash of shimmer, which this does not. If you can't tell already, this will be going back... (and I did not include a swatch of it).


Swatches left to right are Orly Thrill Seeker, China Glaze Pool Party and Celtic Sun. In person Thrill Seeker is more green.

I was really feeling neons in July, another bright haul to come shortly!