Showing posts with label funky french. Show all posts

Thursday, October 15, 2015

How To Block A Zombie

Today I have a quick and easy mani refresh with China Glaze Zombie Zest and NAME. I was getting some slight tip wear but wanted to get a bit more mileage out of my mani so I did some colour blocking. I did this for the same reason this past summer and have been wanting to try it again ever since. It's super easy to do, I literally did this 10 minutes before leaving the house!


The most important and time consuming part is sectioning off the nail with striping tape, although it didn't take that long. I used Sally Hansen Xtreme Wear Black Out to full in the space. Always remember to remove the tape right after application for a crisp line and to avoid having the polish drying on the tape and peeling off. Tweezers are hand in application and removal of the tape.


I sealed it off with Ask Cosmetics top coat and was out the door! I really love this look. I love how something so simple can make something look more than it actually is.


Annnnd... Incase there weren't enough photos in this post, I decided to add a matte topcoat after a few days, which I think I loved even more than the glossy look!


Wednesday, August 14, 2013

Funky French Refresh

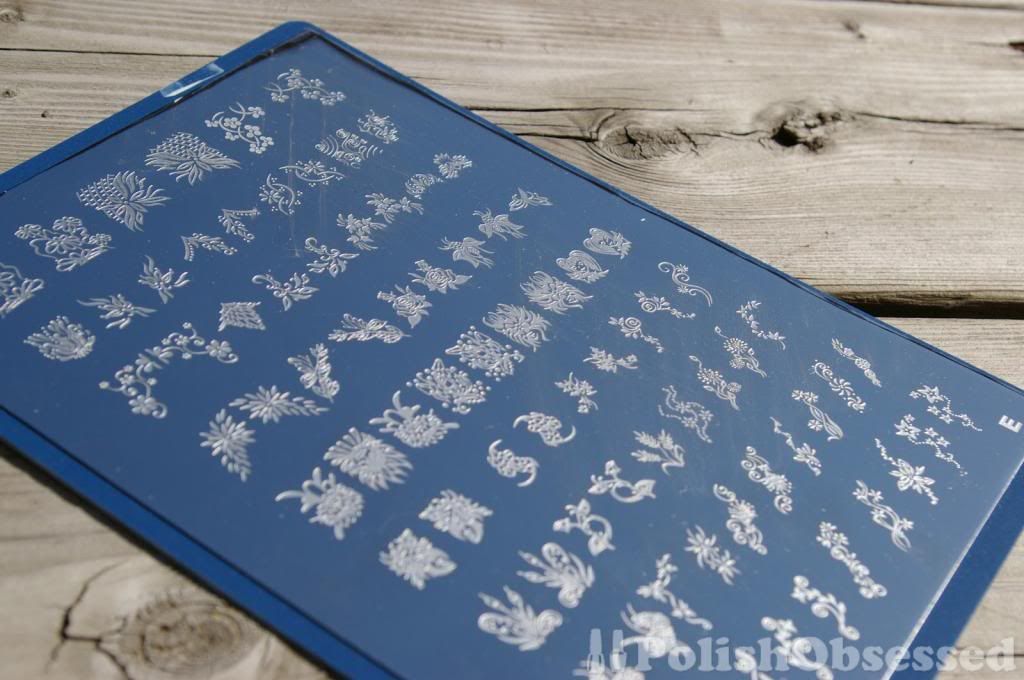
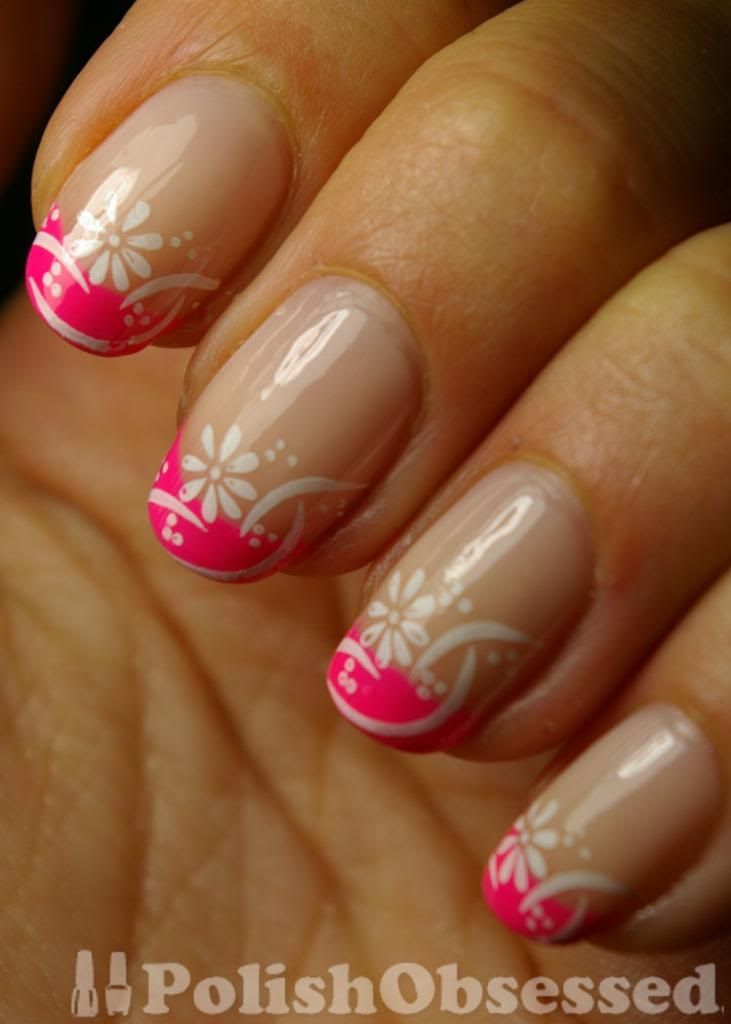
Today I have a quick and easy refresh I did for my funky french hot pink tips. Nince I used a neon it started to chip earlier than I wanted to. To try and hide the chips, I made a few touch ups to nails that needed it and applied a cute floral stamp from my jumbo Cheeky plate, E. I love this plate! The full nails designs are super sized and most of the designs have a mirror image so they are easy to work with when placing them on either your left of right hand.


 photo cheeky-e_zps6e9f4ee9.jpg

In the photo above the design I used can be seen in the second row, the third and fourth images from the right. You'll need to enlarge the photo to see them better. I have had no issues with this plate the images have always stamped very cleanly, kinda makes me want to buy more lol. The only think I don't like about it is the metal plate with the designs is starting to peel away from the plastic board it is affixed to.

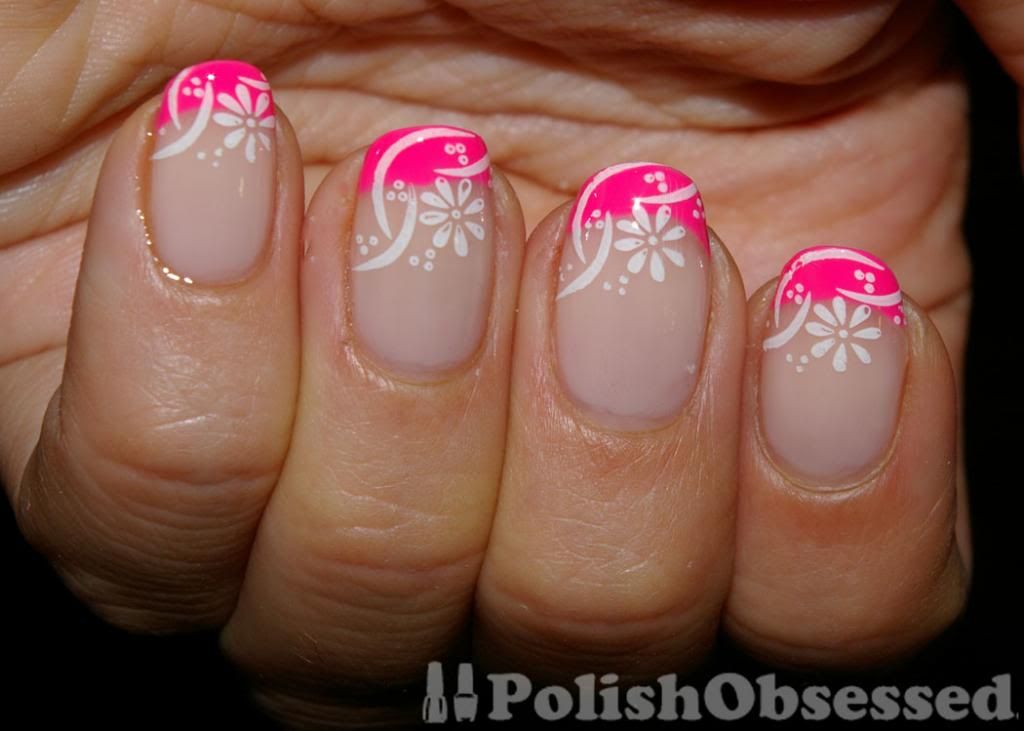
Back to the manicure, I used Sally Hansen Insta-Dri in Whirlwind White for stamping and applied the design to the middle of the pink French tip.

 photo IMGP6857_zps20632660.jpg


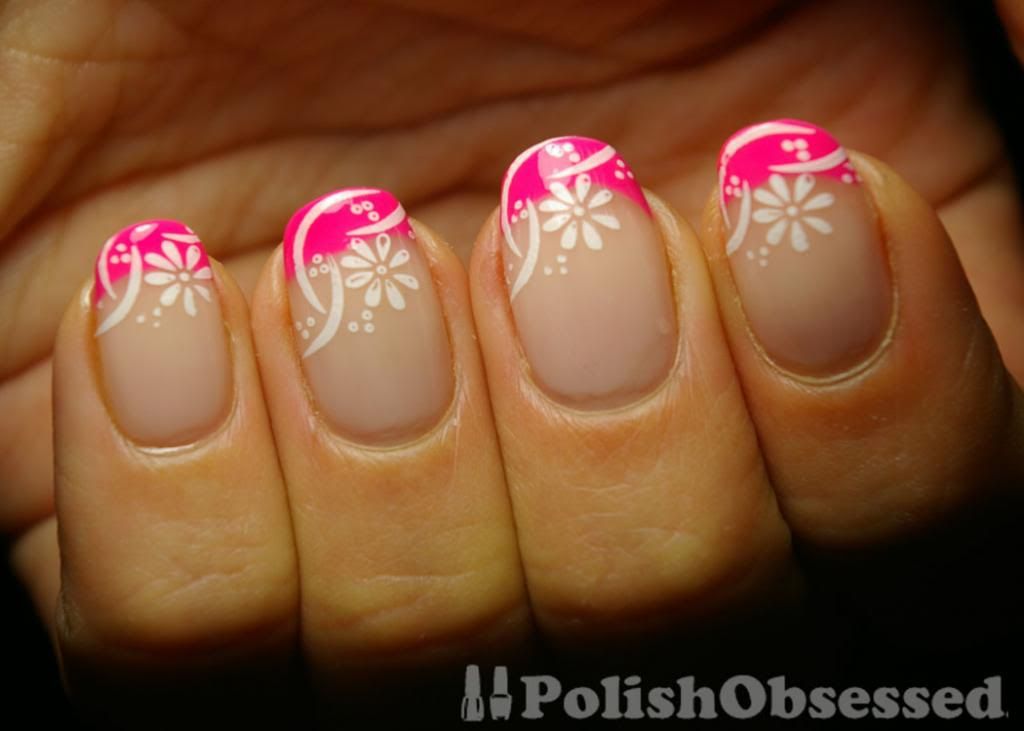
This design also helps to even out the shape of the French tips and makes them look more uniform. Add a little rhinestone to each little flower and you have a tropical summer mani :)

 photo IMGP6858_zpsa51c1ec4.jpg

 photo IMGP6854_zps6b863485.jpg

I love this mani, it makes me want to do more fun coloured Frenches and experiment with more design options.

Tuesday, August 13, 2013

Hot Pink Tips

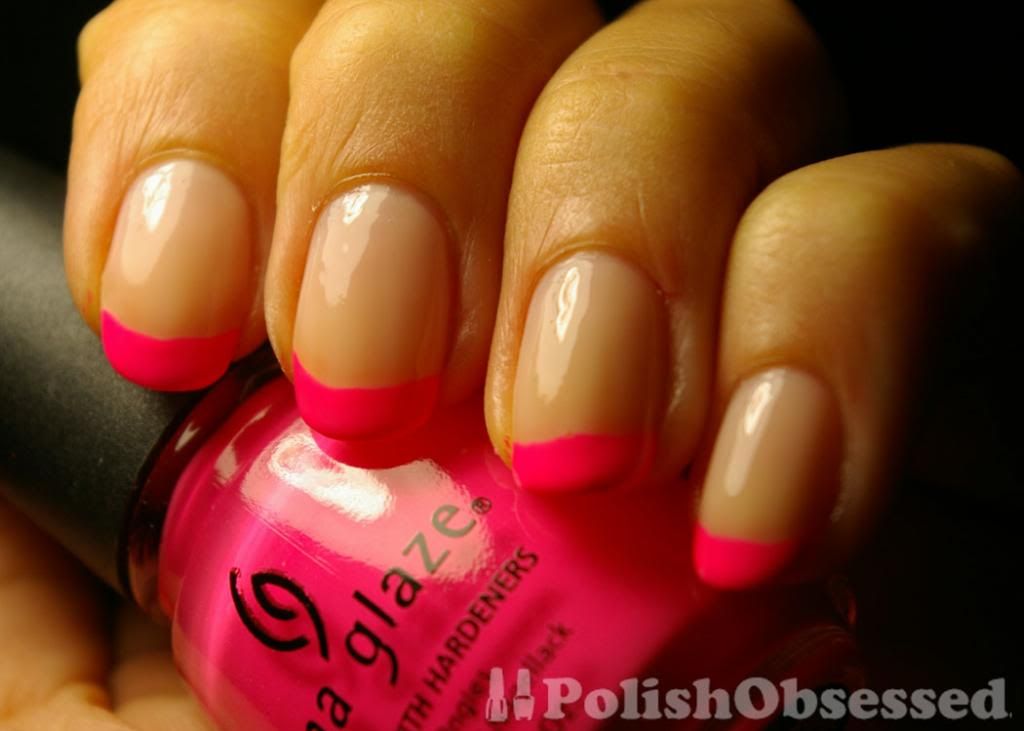
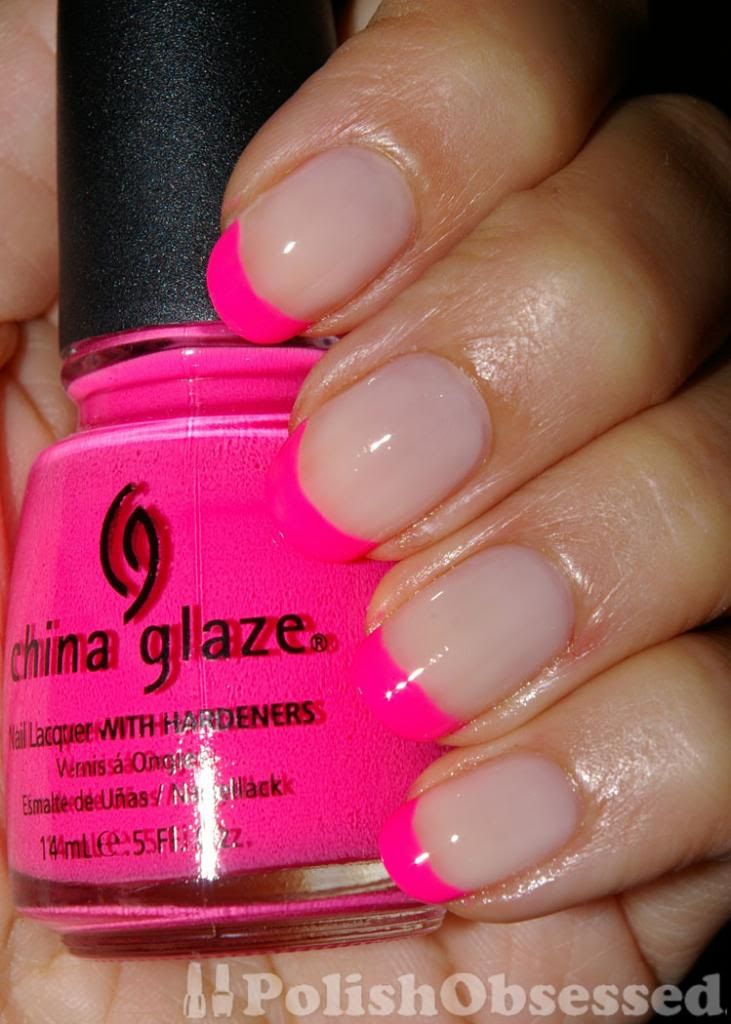
I had been thinking of doing a traditional French manicure for a while now, and just as I started to apply my base I changed my mind! I still did my French, but with China Glaze Shocking Pink.

 photo IMGP6838_zps0fd80949.jpg

I started off with a coat of Nail Tek Foundation II which I followed up with a generous coat of OPI Bubble bath, my favourite sheer nude! I think my bottle may be discolouring or something, were there different batches of this shade? I have seen other swatches online that appear to be more pink, mine leans slightly more milky. It is perfect for covering up and natural nail bed imperfections and staining in one coat!

 photo IMGP6841_zpsf8e7f1b9.jpg

I then took out Shocking Pink and free handed the tips following the natural line on my nails, I didn't want any white to be visible under the pink tip! I applied two coats and some minor touch ups here and there. Overall I think I did pretty good, haven't free handed in a while. Added a nice thick coat of Seche Vite to even everything out and I was done. I LOVE this look! I was thinking of doing this for my vacation but wasn't sure I would really like it for a full week, not bringing any polish with me.

 photo IMGP6845_zps44cc483d.jpg

Any ideas for a fun vacation manicures?

Monday, October 29, 2012

Halloween Funky French

A simple mani refresh today, I actually had this in mind for a while specifically for Halloween. Only 2 days left by the way ;)

I used a thin striper brush and OPI's Lincoln Park After Dark Matte to create some matte black French tips over OPI's Zom-Body to Love. Although Lincoln Park After Dark isn't a black it is so dark that it appears to be. It is actually a deep vampy purple. You can think of this as a simplified Frankenstein mani that has been popular the last few years.


I used my trusty eyeball to help with the contrast on the tips, you can see them a lot better in the photo below.


I think it's Halloween chic :)

Tuesday, February 28, 2012

Funky French Fauxnad

I felt that some of my French tips looked a little uneven since I followed the natural smile line of my nails when free-handing the tips, so I decided to camouflage the tiny imperfections with some fauxnad!


I used plate BM220 and Sally Hansen 10 Day No Chip in Blackberry to stamp. This is the very first time I have ever tried stamping with any French tip image for a full mani. It wasn't as hard as I thought to line up the images with my tips. This particular plate was also a dream to work with, clean crisp stamps every time.


The pattern I used, incase you couldn't tell, is what appears to bs a cross between a cheetah and snakeskin pattern. I think it helped to define the original lines I created and clean up the look over all too. I love how the glitter from the base peaks out through the stamp.

Wednesday, July 20, 2011

Pink Wednesday! Featuring a Summery French :)

I'm starting to catch on with pink Wednesday :) I actually have a ridiculous amount of pink polishes, it used to be all I wore a couple of years ago. Now I want a different colour family all together each time I change my polish!

I was feeling like a funky French the other day and decided to go with a pink toned coral, Orly's Ole, from last years summer collection. Other supplies I used included:

- Nailene French Tip Guides
- Perfect Formula Pink Base Coat for French Manicures
- Konad Plate M29
- Konad White Special Polish
- Seche Vite Top Coat
- Small silver rhinestones (pointer fingers only)

Basically the process for this French manicure is the same as I always do
1. Apply my base
2. Once fully dry apply my French tip guides
3. Add 2 coats of polish with some dry time in between
4. Carefully remove the guides with tweezers and apply a top coat.

Why am I describing the process in steps? because somewhere between step 1 and 3 my base coat failed me! As I peeled the guides off, the base coat came with it! Not on all nails, but enough to bother me. I have never had this problem with the French tip guides EVER! And the polish was fully dry! It just peeled right off! This wasn't even the worst of it unfortunately... I continued with step 4 and the Konading and everything looked perfect. I took my photos below right after application, besides some smearing of the stamp not too bad right?


The polish actually started to peel up mid day... I was pissed. I got my seche vite and put some under and on top of the peal and that seemed to save it, but not before one full nail of polish peeled right off.


This is the base coat I used

I ended up redoing my pointer finger with a proper base this time with the pink base on top and went through the rest of the steps as normal. I have not had any problems at all with this nail at all. Sooo disappointed with the perfect formula's base :( I actually reviewed their French mani kit before and thought it was not too bad (minus the thick white tip "polish), but I guess this shows you how it wears. I loved the consistency and colour of the base though, it had a pink tint and is perfect!ly smooth. Next time I will just have to use a regular base beneath it.


I had to vent a little seeing as I put way more time in to French manis than regular ones! In case you were wondering I used the middle hibiscus flower on the plate without "Hawaii".

Thursday, December 23, 2010

A Party Hearty French - 2 More Days Until Christmas!

Hey Ladies,

Today I have another festive French to share with you! I really liked the look of my last French mani and I never really do them, so when I needed a quick mani change I thought I'd try out my new Nailene French manicure kit I purchased the other day to help me out.

I was sent another kit similar to this one from Nailene a while back (it came with a polish pen and a sheer base coat), but when I saw this one on sale I knew I had to have it! A quick overview of the contents include:

- Acrylic strong topcoat
- Sheer shimmer base coat
- White polish
- French tip nail guides

I won't go in to much detain on the kit, I mainly just used the white and tip guides.

The look I was going for was Christmasy but simplicity, that is why I chose to have a white tip with Party Hearty (pure Christmas in a bottle) on top.

I applied 2 cots this time of OPI bubble bath for my base. Once I was 100% sure that the polish was dry I applied my sticker guides, I love these things :)

look how long my nails are here! i chopped them down a bit last night, they were getting a little too long for me!

Unfortunately I had some issues with the white polish that came in the kit. It was a little thicker than I expected and the brush was a littler smaller that what I an normally used to. It was hard to apply the white polish. I'm not sure if it was because the formula was so thick, but when I carefully peeled the stickers off with my tweezers the polish wanted to lift off also :(


I ended up doing some freehanded touch ups, and since the lines weren't crisp I added a chrome stripe under like in my last mani. I finished everything off with Seche Vite because if I didn't the polish would have probably never dried!

Overall I think the mani is alright, I would have preferred it without the stripe it it is okay for now. I wore this for 4 days and got some chipping on day 3. I want to give this polish a second chance so i'll have to thin and test it out again.


What do you think?

Wednesday, December 22, 2010

Christmas Nails - Party Hearty Refresh

Hello Ladies,

Wow, only a couple of days left until Christmas! My family usually celebrates on both Christmas eve and Christmas day, plus I'm Italian so there's usually LARGE amounts of food involved! lol, but I love it, what's better than spending time with your family and eating amazing food for 2 days straight!?

Anyways, on to the mani. Below I have Party Hearty, it kicks ass, best Christmas glitter ever! I decided to use this (finally) for a quick and easy mani refresh on my red and green french I shared with you the other day.


To update my last mani I used a striper brush and a Sally Hanson chrome polish to carefully draw an outline along the smile line of the polish.


Next I added Party Hearty to my ring finger for some extra shine!


Pretty simple huh? I like really liked the French mani on its own but this was fun too :) I only wore it for a day or so before I moved on to something else.


What do you ladies think? What is your favorite way to use Party Hearty?

Tuesday, December 21, 2010

Christmas Nails ...4 more days till Christmas!

Hello ladies!

Today I have a funky french Christmas mani to share :)

For this look I used:
- Nailene guide stickers
- OPI, Bubble Bath
- China Glaze, Emerald Sparkle
- China Glaze, Ruby Red Pumps
- Seche Vite top coat


I applied 1 coat of OPI, Bubble bath as a base (...and to cover up some slight discoloration in my nails), waited a bit for that to dry and once I was 100% sure they were, I applied the french tip guides.

This was my first time using the nailene french tip guides and they worked out very well! the only issue I had with them was the line wasn't as crisp because of the glitter in the polishes. I did go over some nails again to try and get a cleaner line, but it was nothing that bothered me too much :)

Left Hand

I finished everything off with a a coat of Seche Vite, which was also my first time using it and wow, everything dried so fast and the final look of my nails was super glossy and shiny! They almost looked like acrylics! I can't believe I never used this before, definitely need to stock up, I really love the look, especially for French manis.

My rarely seen right hand lol

So that is it, I used Emerald Sparkle for my thumb and ring finger and ruby pumps for the rest, but you can see that in the pics lol. What do you think? I really like this one, simple but festive :)

Friday, October 8, 2010

A Subtle Halloween Look

Hey Ladies,

Today I have another Halloween inspired mani, this time its a little more subtle and wearable this early in October lol

I used Colour Club's Pucci-licious for the French chevron tips and a black Sally Hansen with a striper brush for the swipes.

click to enlarge!

I really love this colour! This and Twiggy were my reason for buying the Poptastic collection, they are so great :)

To make this look a little halloween, I added a subtle chrome spider to my ring fingers with a Sally Hansen Chrome polish and finished it off with an orange rhinestone. I really love this look and have been wearing it for 3 days now.

The best thing about the look is that you can change up the colours and stamp/design choice to make it appropriate for many different occasions or themes.

click to enlarge!

I got some inspiration for the colours in the mani from Tim Burton's Nightmare Before Christmas, one of my all time favorite movies! I remmber seeing it in the theater as a kid :)

Just so we are clear though, this is not a Halloween movie, It is a Christmas movie! I took inspiration from Halloween town :)

Anyways, Have a great weekend! Here in Canada this weekend is the Thanksgiving long weekend and Monday is also my dad's Birthday so I may not post then. I will have to see how how the day goes, but If I don't post, I will on Tuesday.

Happy Thanksgiving for those celebrating it :)

Monday, September 20, 2010

Claire's Mood Polish

Hey ladies!

Today I have for you one of Claire's mood polishes, Daring/Innocent. This is Grey when cold and a peachy yellow when warm.

Click to enlarge

Application of this polish was super smooth and easy, the polish dried quickly and to a matte finish. Below are my fingers cold.

Click to enlarge

Below are my fingers warming up.

Click to enlarge

and lastly, below are my fingers fully warm.

Click to enlarge

This polish is interesting. I kind of like when it is in between, it has this caramel colour to it that is different. I get a little bit of a funky french with this polish, but I that is due to me chopping off my nails :( ... I had a couple breaks on the weekend, so I decided to start all over.

The "funky French" I do end up getting makes my nails look dirty or something lol it is a very different polish, definitely do not own anything like this in my collection.

I almost wish they had the grey with a more neutral peachy colour, so it would actually look like a French manicure.

What do you think of this polish? If you own it, what has your experience with it been like?

Click to enlarge